


Today I’m going to teach you how to cook a Blinn-Phong. There are days when you want to eat a fancy, tasteful PBR dish, but sometimes you are hungry and you just want to taste something as good and as simple as a Blinn-Phong. It can be cooked fast, the ingredients are easy to find and you can add the seasoning according to your preferences.
Blinn-Phong actually comes from Blinn and Phong. Phong was created first and then a portion of Blinn was added on top of it, changing a bit the Phong taste while reducing its cooking time. Fair enough.
Ingredients
- 1 Ambient color
- 1 Diffuse color
- 1 Specular color
- Shininess (according to taste)
- 1 Mesh (according to taste)
Directions
Let’s divide this in 3 parts, let’s first prepare the Ambient, then the Diffuse and, finally, the Specular. Then, we cook them together.
In order to cook this dish you’ll need an convection oven. The convection is necessary so the Ambient can be evenly cooked around the mesh. It’s also mandatory that you have a directional light on your kitchen (who doesn’t?), otherwise you won’t be able to cook neither the Diffuse nor the Specular.
Ambient
The Ambient is the easiest part. Take the Ambient color and adjust it with an intensity according to your taste. Reserve.
If we were talking about code, it would be something like this:
fixed3 ambient = _AmbientIntensity * _AmbientIntensity;
Like I said, if your oven has convection, the Ambient will spread evenly on your mesh as soon as you cook it.
Diffuse
The Diffuse takes more time to prepare. Take your mesh and place it somewhere (your mesh probably has normals on its surface, if not, you should probably return it). Adjust your directional light as you prefer, but keep in mind that the angle between it and the normals on the mesh’s surface will determine the diffuse contribution on its surface. The smaller the angle, the greater is the contribution.
Once you adjusted your light, take the Diffuse color and adjust its intensity according to your taste. Reserve.
Again, if we were talking about code (but we are not), we would have something like this:
fixed dotNL = max(dot(normalDir, lightDir), 0.0);
fixed3 diffuse = _DiffuseIntensity * _DiffuseColor * dotNL;
Specular
Here is where your dish shines (sorry). But, really, the shininess of your dish will be determined here and it depends on the reflection of your directional light and where you look your mesh from.
The Blinn addition also comes here, but I’ll first teach you how to prepare the Phong and then we go for Blinn-Phong.
Phong
The Phong’s specular contribution depends on the angle between the directional light reflection on your mesh’s surface and the direction of your sight. The smaller the angle, the greater is the contribution. You can adjust the contribution by adding some Shininess according to taste. Simple as that.
Code? Something like this:
fixed3 lightReflection = reflect(-lightDir, normalDir);
fixed dotRV= max(dot(lightReflection, viewDir), 0.0);
fixed specContrib = pow(dotRV, _Shininess);
Blinn-Phong
On the other side, the Blinn-Phong’s specular contribution depends on a thing called half vector, that is a halfway vector between the directional light and your sight direction, and the normals on your mesh’s surface. The smaller the angle between them, the greater is the contribution. You can also adjust the contribution by adding Shininess, however if you want to keep a similar taste as Phong you have to add four times more Shininess here.
Code…:
fixed3 halfVector = normalize(lightDir + viewDir);
fixed dotHN = max(dot(halfVector, normalDir), 0.0);
fixed specContrib = pow(dotHN, _Shininess * 4.0);
Then…
Whether you choose Phong or Blinn-Phong, take what you have, take the Specular Color and adjust the intensity as you wish. Reserve.
fixed3 specular = _SpecularIntensity * _SpecularColor * specContrib;
Finally
Once you prepared your ambient, diffuse and specular, you are ready to mix them up. Then, just do it.
fixed3 finalColor = ambient + diffuse + specular;
You dish might look cool already, but it can get even cooler if you work on its texture.
fixed3 col = tex2D(_MainTex, i.uv);
finalColor *= col;
That’s almost it!
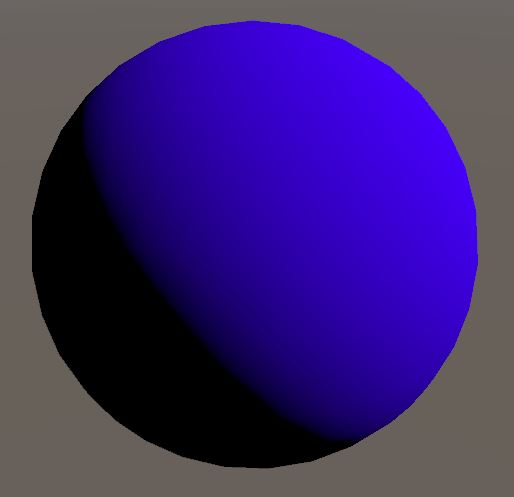
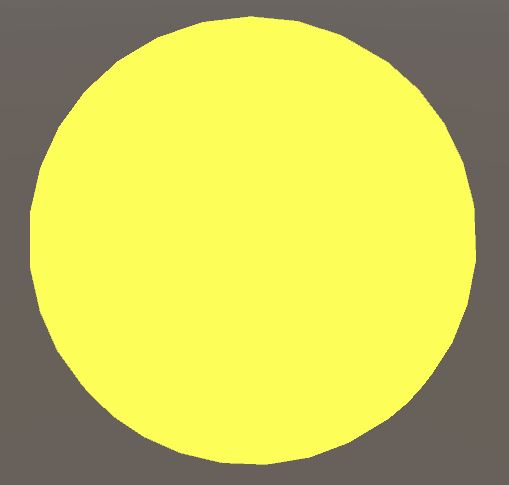
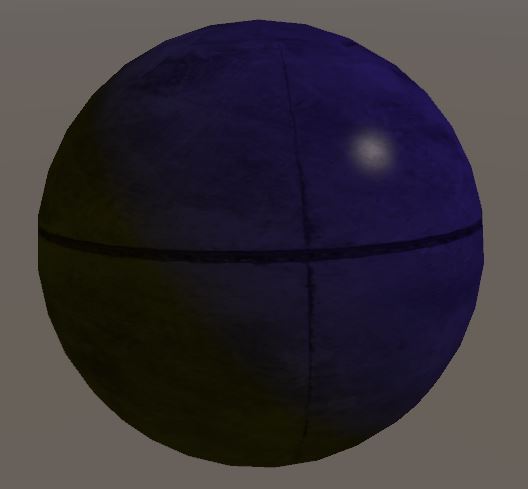
At this point, if you cooked a sphere like I did, you might have a shading like one of these images (without the texture).
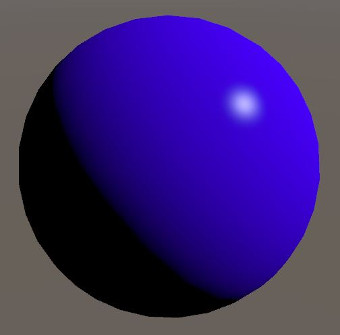
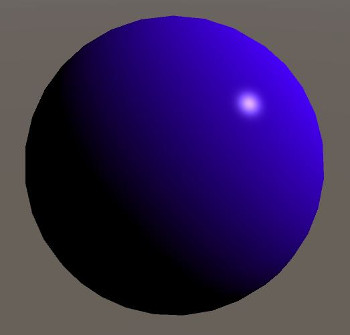
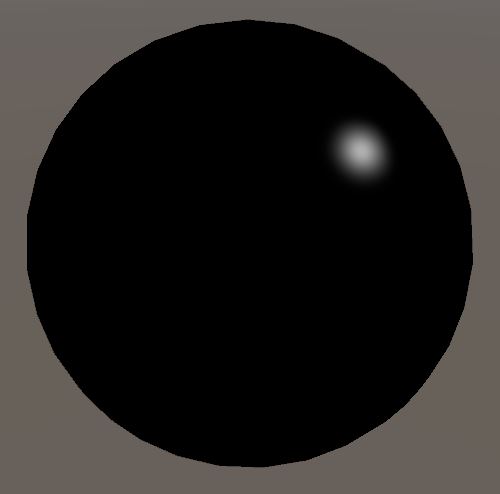
If it is similar to the image on the left, you are done here, go to next section. Otherwise, if you got something like the image on the right, it’s necessary to make a little adjustment on your way of cooking.
The problem is that you cooked linearly, but in the end you showed your dish in a gamma environment. The good news is that this is easy to fix. Just reduce a bit the temperature of your oven.
finalColor = pow(ambient + diffuse + specular, 1/2.2);
That’s it, folks!
Some final thoughts
Now let’s put the silliness aside a bit. Blinn-Phong reflection model is well known and has explanations everywhere, here I was just trying to do something different. You can find the full shader source code below and also on my github. I plan to use this shader as starting point for some other posts.
Shader "Unlit/BlinnPhong"
{
	Properties
	{
		_MainTex ("Texture", 2D) = "white" {}

		_AmbientColor("Ambient Color", Color) = (1,1,1,1)
		_DiffuseColor("Diffuse Color", Color) = (1,1,1,1)
		_SpecularColor("Specular Color", Color) = (1,1,1,1)

		_AmbientIntensity("Ambient Intensity", Range(0,1)) = 1
		_DiffuseIntensity("Diffuse Intensity", Range(0,1)) = 1
		_SpecularIntesity("Specular Intensity", Range(0,1)) = 1

		_Shininess("Shininess", Float) = 1
	}
	SubShader
	{
		// ForwardBase is needed to work with unity directional light
		Tags { "RenderType"="Opaque" "LightMode" = "ForwardBase"}
		LOD 100

		Pass
		{
			CGPROGRAM
			#pragma vertex vert
			#pragma fragment frag

			#include "UnityCG.cginc"

			struct appdata
			{
				float4 vertex : POSITION;
				float2 uv : TEXCOORD0;
				float3 normal : NORMAL;
			};

			struct v2f
			{
				float2 uv : TEXCOORD0;
				float3 normal : TEXCOORD1;
				float4 vertex : SV_POSITION;
				float3 worldPos : TEXCOORD2;
			};

			sampler2D _MainTex;
			float4 _MainTex_ST;

			fixed3 _AmbientColor;
			fixed3 _DiffuseColor;
			fixed3 _SpecularColor;

			fixed _AmbientIntensity;
			fixed _DiffuseIntensity;
			fixed _SpecularIntesity;

			float _Shininess;

			v2f vert (appdata v)
			{
				v2f o;
				o.vertex = UnityObjectToClipPos(v.vertex);

				// Take the normal and convert to world space.
				o.normal = UnityObjectToWorldNormal(v.normal);

				// Take vertex position in world space.
				o.worldPos = mul(unity_ObjectToWorld, v.vertex).xyz;
				o.uv = TRANSFORM_TEX(v.uv, _MainTex);
				return o;
			}

			fixed4 frag (v2f i) : SV_Target
			{
				fixed3 normalDir = normalize(i.normal);

				// Light direction
				fixed3 lightDir = normalize(_WorldSpaceLightPos0.xyz);
				// Viewer direction. From camera position to surface position.
				fixed3 viewDir = normalize(_WorldSpaceCameraPos - i.worldPos);

				// Ambient
				fixed3 ambient = _AmbientIntensity * _AmbientColor;

				// Diffuse
				// max is used to avoid shading surfaces that dont face the light.
				fixed dotNL = max(dot(normalDir, lightDir), 0.0);
				fixed3 diffuse = _DiffuseIntensity * _DiffuseColor * dotNL;

				// Specular

				// Phong
				//fixed3 lightReflection = reflect(-lightDir, normalDir);
				//fixed dotRV = max(dot(lightReflection, viewDir), 0.0);
				//fixed3 specular = _SpecularIntesity * _SpecularColor * pow(dotVL, _Shininess);

				// Blinn-Phong
				fixed3 halfVector = normalize(lightDir + viewDir);
				fixed dotHN = max(dot(halfVector, normalDir), 0.0);
				fixed3 specular = _SpecularIntesity * _SpecularColor * pow(dotHN, _Shininess * 4.0);

				fixed3 finalColor = ambient + diffuse + specular;

				// Gamma correction, if needed.
				//finalColor = pow(finalColor, 1/2.2);

				fixed3 col = tex2D(_MainTex, i.uv);
				finalColor *= col;

				return fixed4(finalColor, 1);
			}
			ENDCG
		}
	}
}
Some comments about the shader. First, the advantage of using half vector is that you can compute it per vertex instead of per pixel like I’m doing. There is no performance gain over Phong by doing it per pixel.
Second, if you didn’t understand the linear- and gamma-space talk, I recommend you to read at least the Unity documentation about this. In short, your life has been a lie and you don’t see what you should see. Softwares for image manipulation or cameras store images in gamma-space, but we perform operations in linear-space, but then your monitor shows things in gamma-space. So, we need to handle this if we care about correctness.
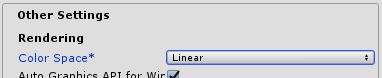
The good news is that if your target device supports a modern API, it is likely to do this conversion automatically. You just have to set the color space to linear in the Unity player settings (see picture). Otherwise, you do need to convert textures to linear space (pow(texture,2.2)) and convert your final color back to gamma-space in your shader. Be aware that textures that store values with some meaning (e.g. lookup texture) don’t need to be stored nor converted to gamma-space.
Cheers!